Create simple pumpkin decorations with chalk finish, diamond dust, and Mod Podge! This craft idea is so easy and perfect for fall and Thanksgiving.
Skills Required: Beginner. This project is very simple; even a young child could do it. It’s actually a great activity for parents to make with children. You don’t need prior crafting or Mod Podge experience to make it look great.
I’ve got a surprise for you today and I can’t wait to share . . . I’m showing you how to make my world-famous pumpkin decorations for your fall mantels and tablescapes!
Okay, world-famous might be a stretch. Even though I do have some friends living in Europe that I might have shown these painted pumpkins to over Skype. They loved them. Doesn’t that count?
Three Step Pumpkin Decor
You’re going to make these DIY pumpkin decorations in just a few simple steps. Here’s the gist of what you’re going to do:
- Paint pumpkins with chalk finish
- Add Mod Podge
- Sprinkle on Diamond Dust
The results are subtle yet (in my opinion) make a big impact when added to your autumn decor. Plus this is a fully customizable project, which means your color palette is going to work (you just have to find the right paint colors).

The Secret to Beautiful Faux Pumpkins
I’ve got a little secret for you when it comes to these pumpkins – they are made of foam. Yes . . . I know it’s hard to believe, because they look as if you picked them up that they’d be somewhat substantial. When in fact, they are very lightweight.
I have two secrets for you that I use to make these pumpkin decorations less crafty and more worthy of department store shelves (or at least like I bought them at Target in seasonal or something!). Here they are:
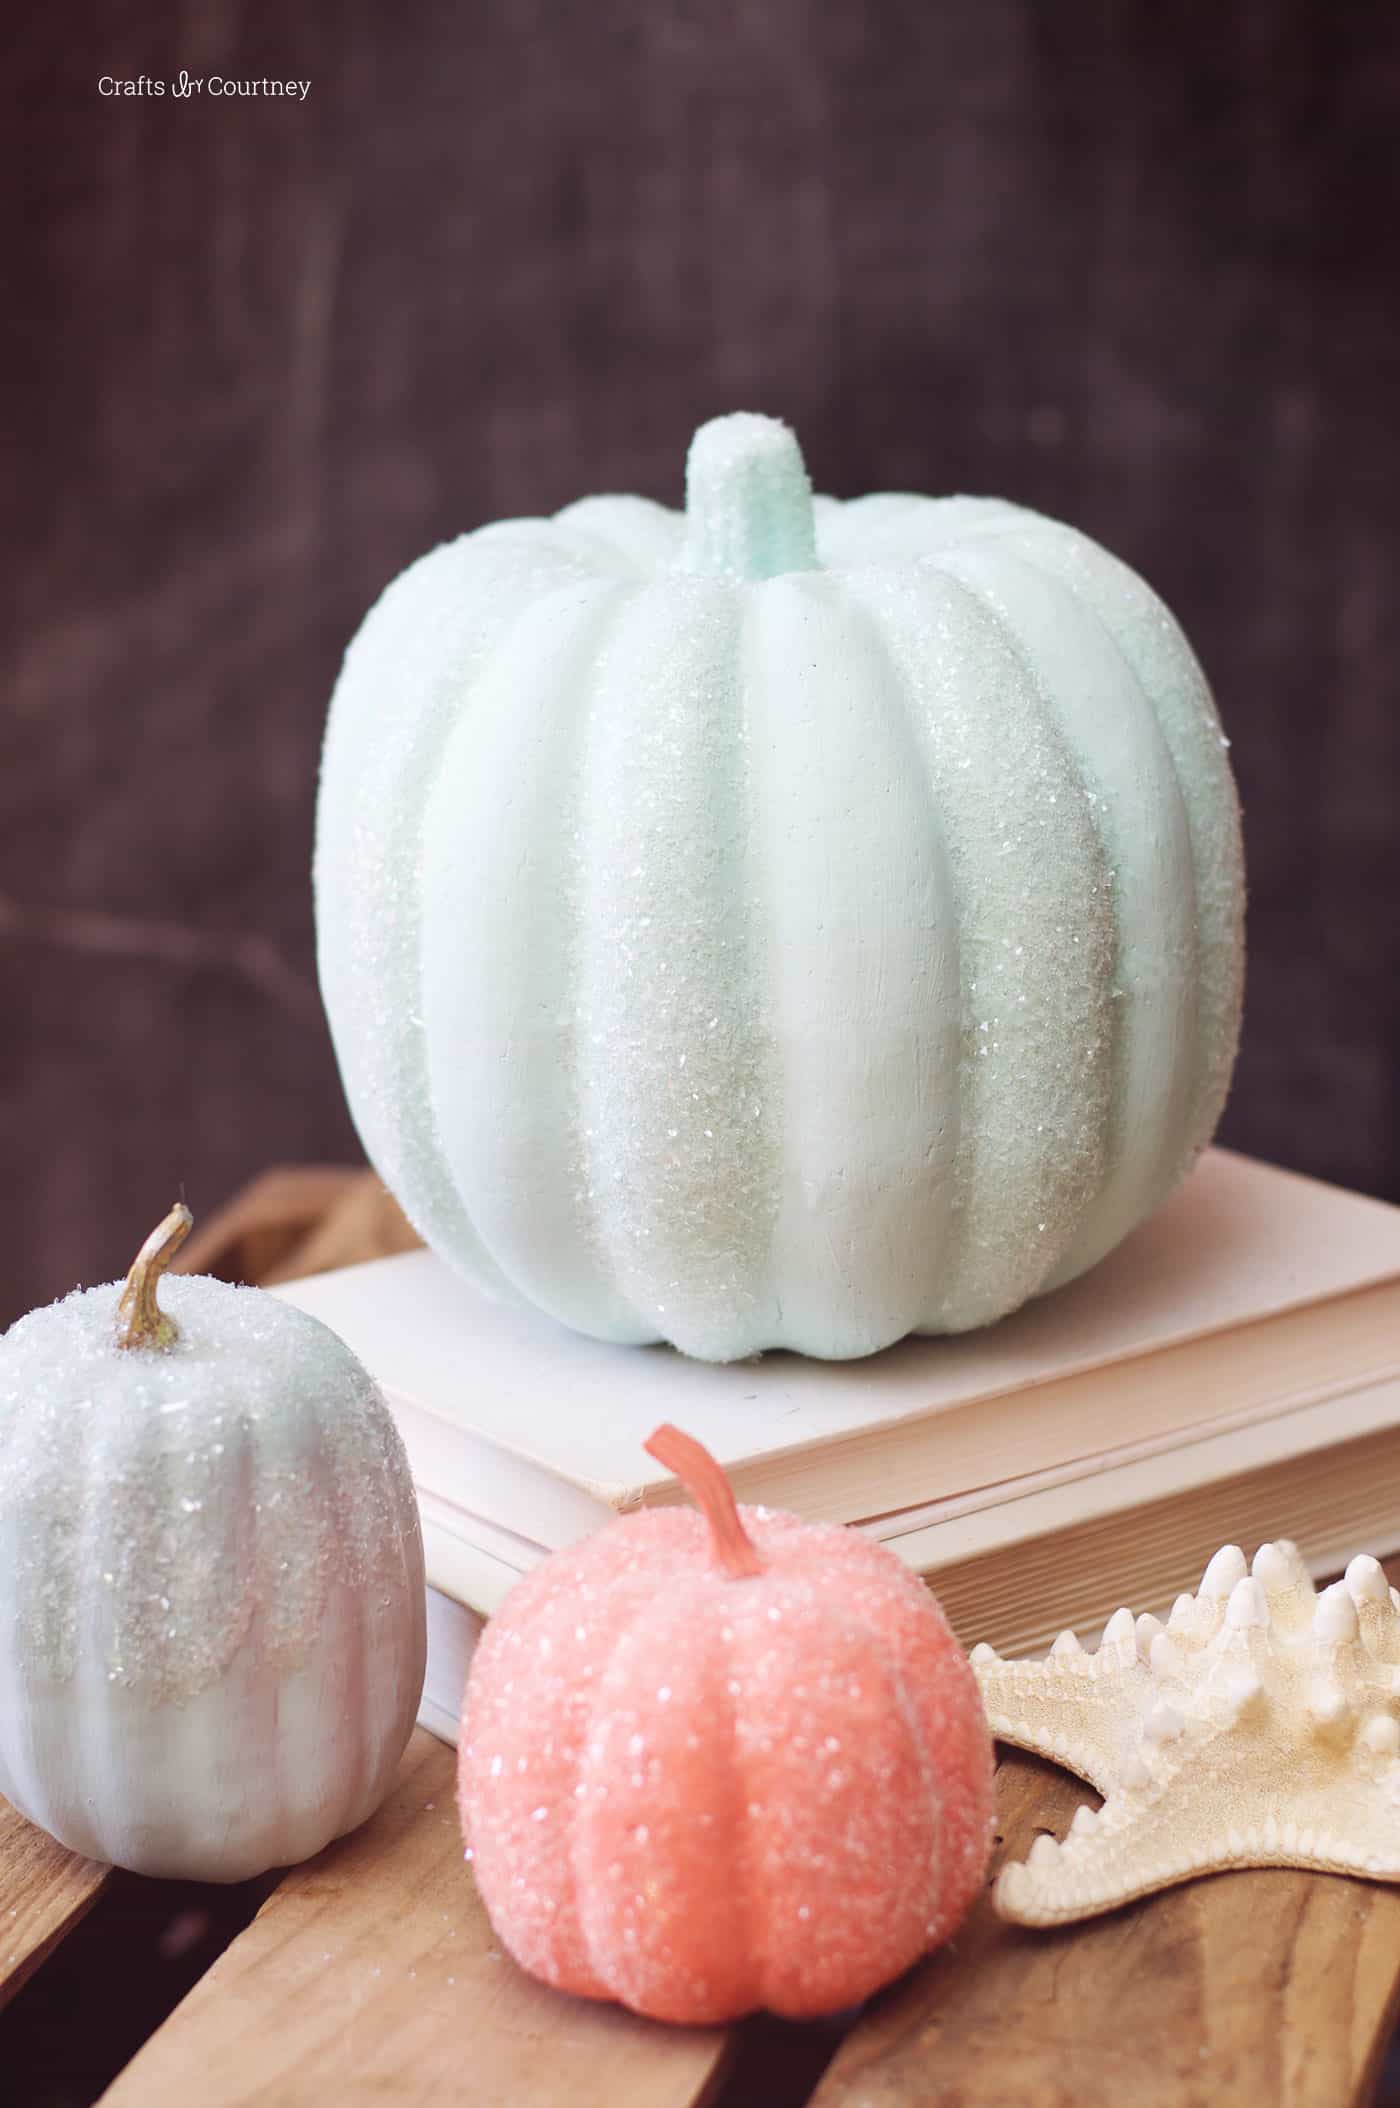
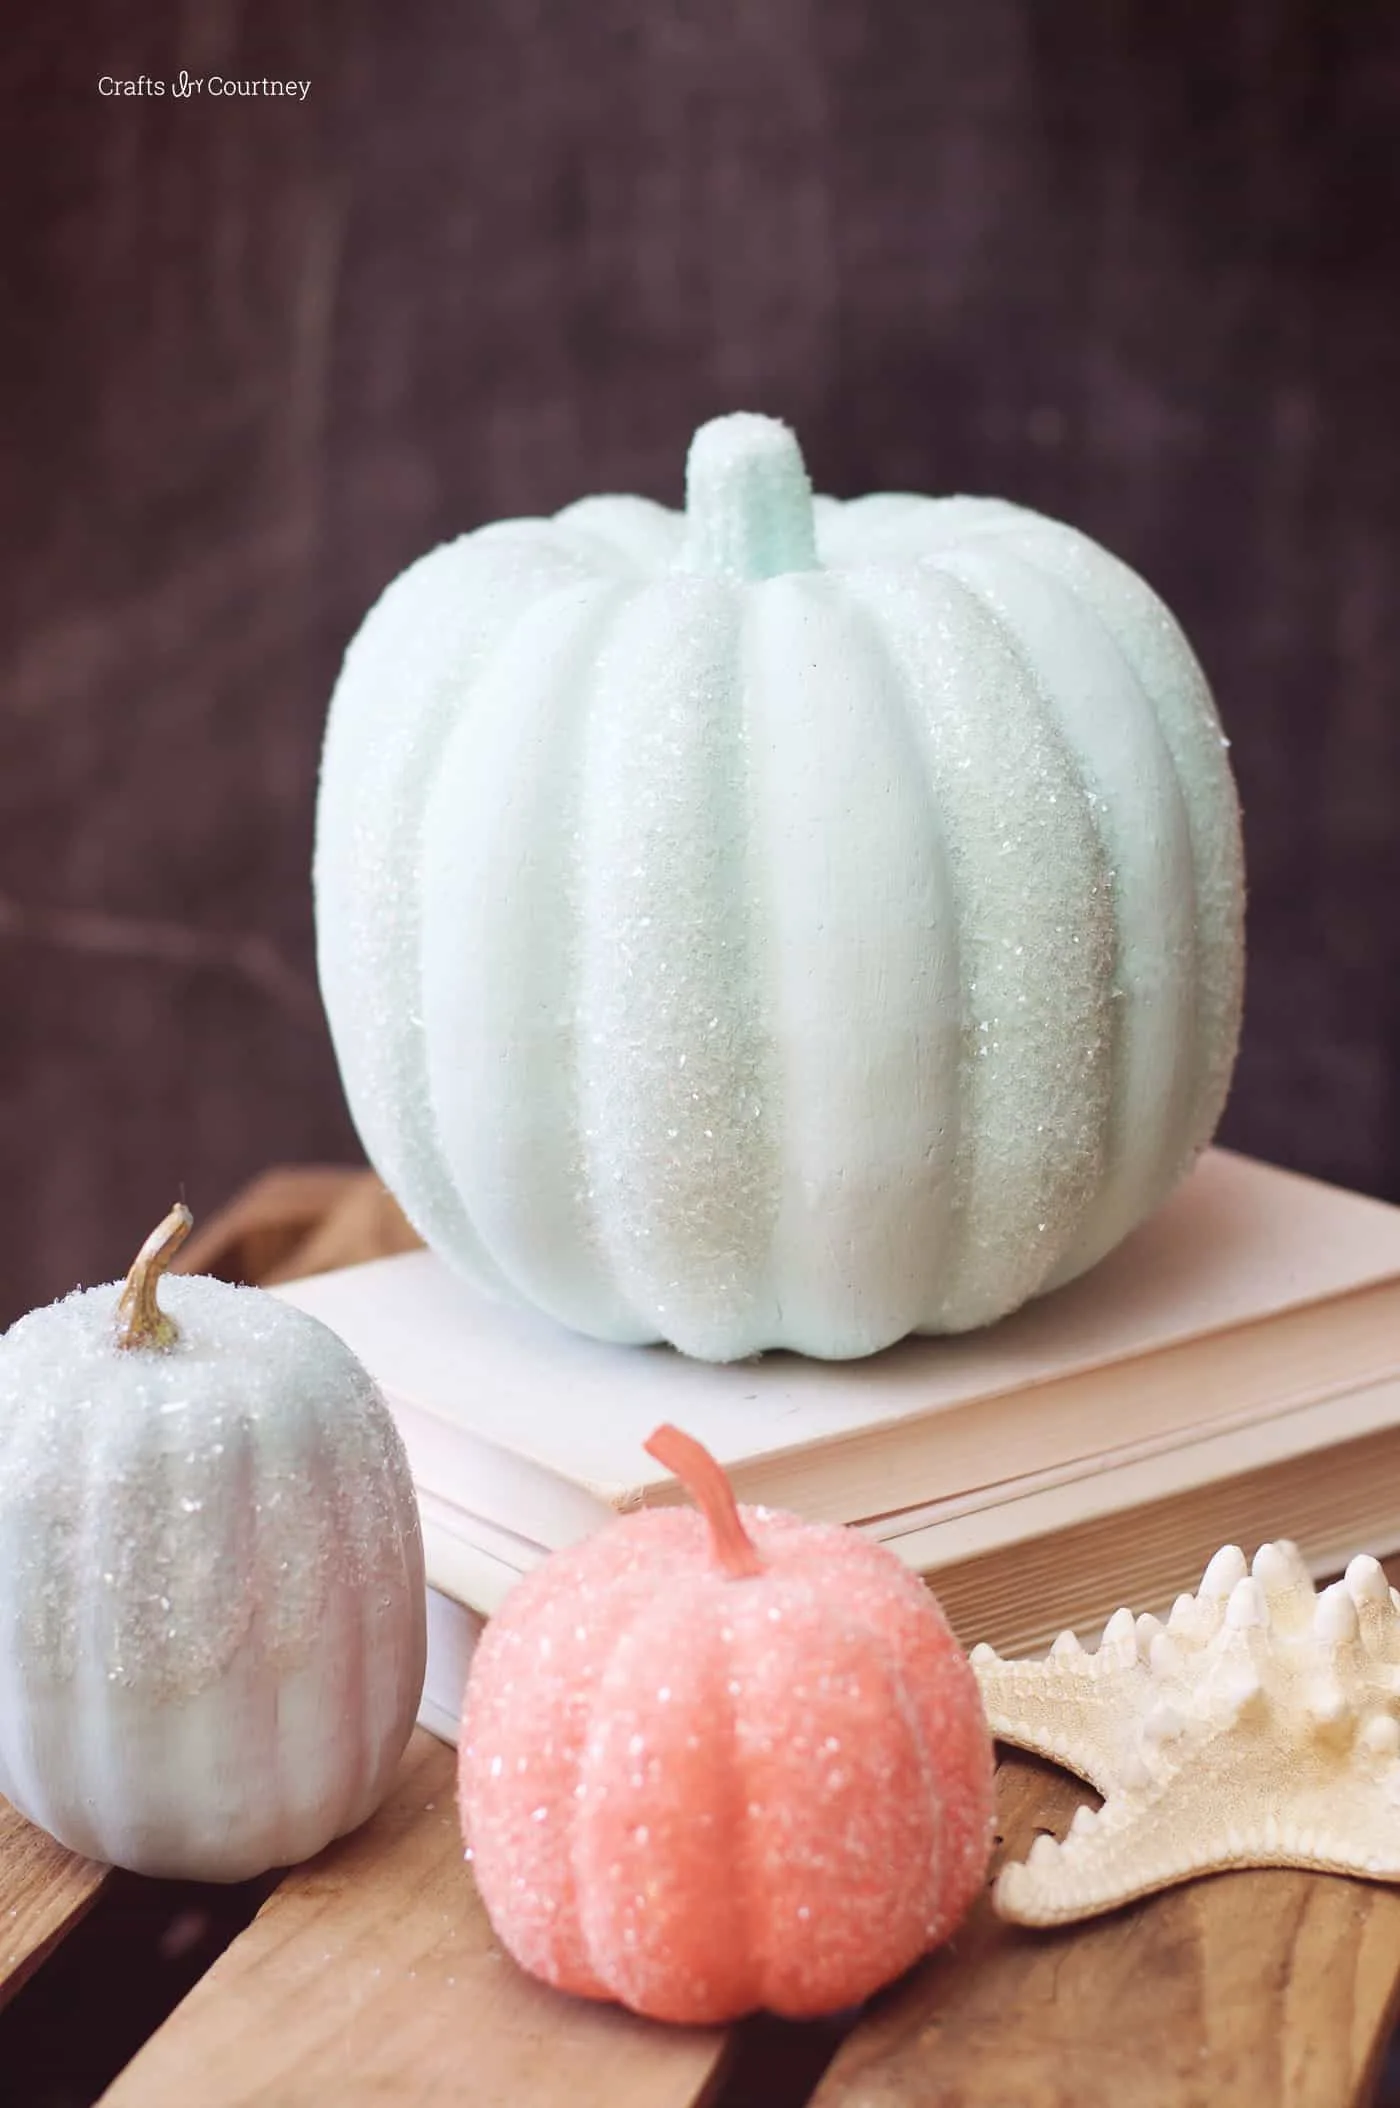
- Use muted tones. I find that bright colors with these sorts of pumpkins are cool, but if you’re looking for sophisticated, go with muted tones that aren’t very saturated. Gray, mint, coral, lavender, rose pink, midnight blue, and similar shades are all perfect for these pumpkins.
- Use a matte finish paint. Glossy is going to give you the Candyland effect here. Stick with a chalk finish as I mention in the supplies, and you’re going to get that beautiful look you desire. Trust me on this one!
Applying the Diamond Dust
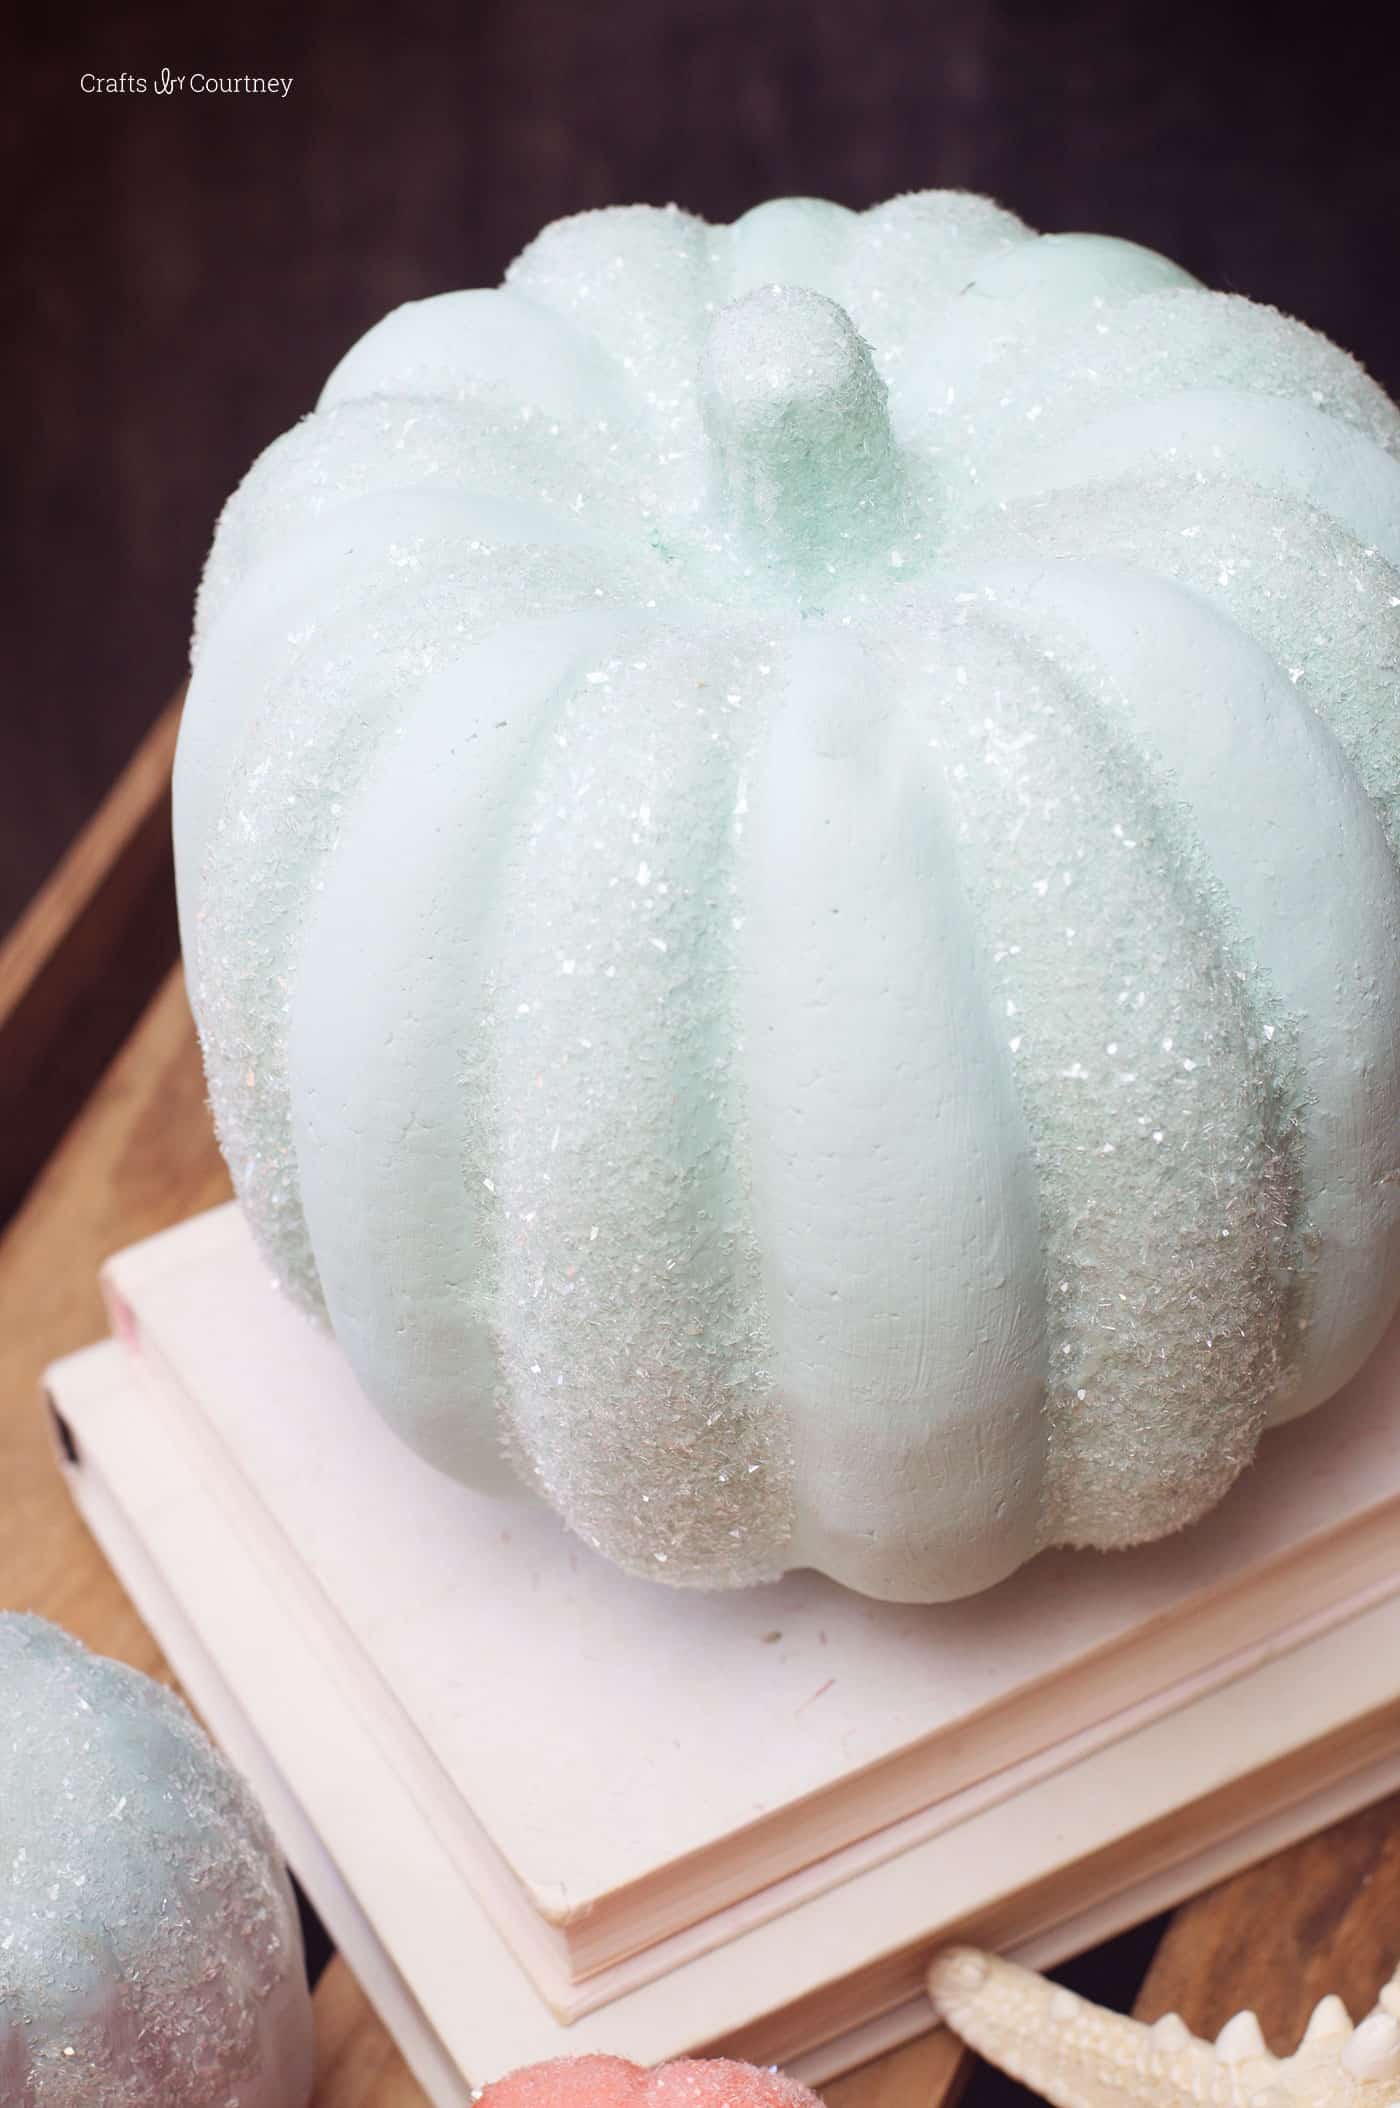
You’ll see Mod Podge Matte in the supplies photo, but I ended up using Mod Podge Gloss only in the areas where I applied Diamond Dust. I did say matte finish was best, so where you paint should remain matte.
But where you apply the Diamond Dust should use Mod Podge Gloss, and it keeps from dulling the dust.
Are you ready to make this DIY pumpkin decor? Keep reading!
Pumpkin Decorations for Fall
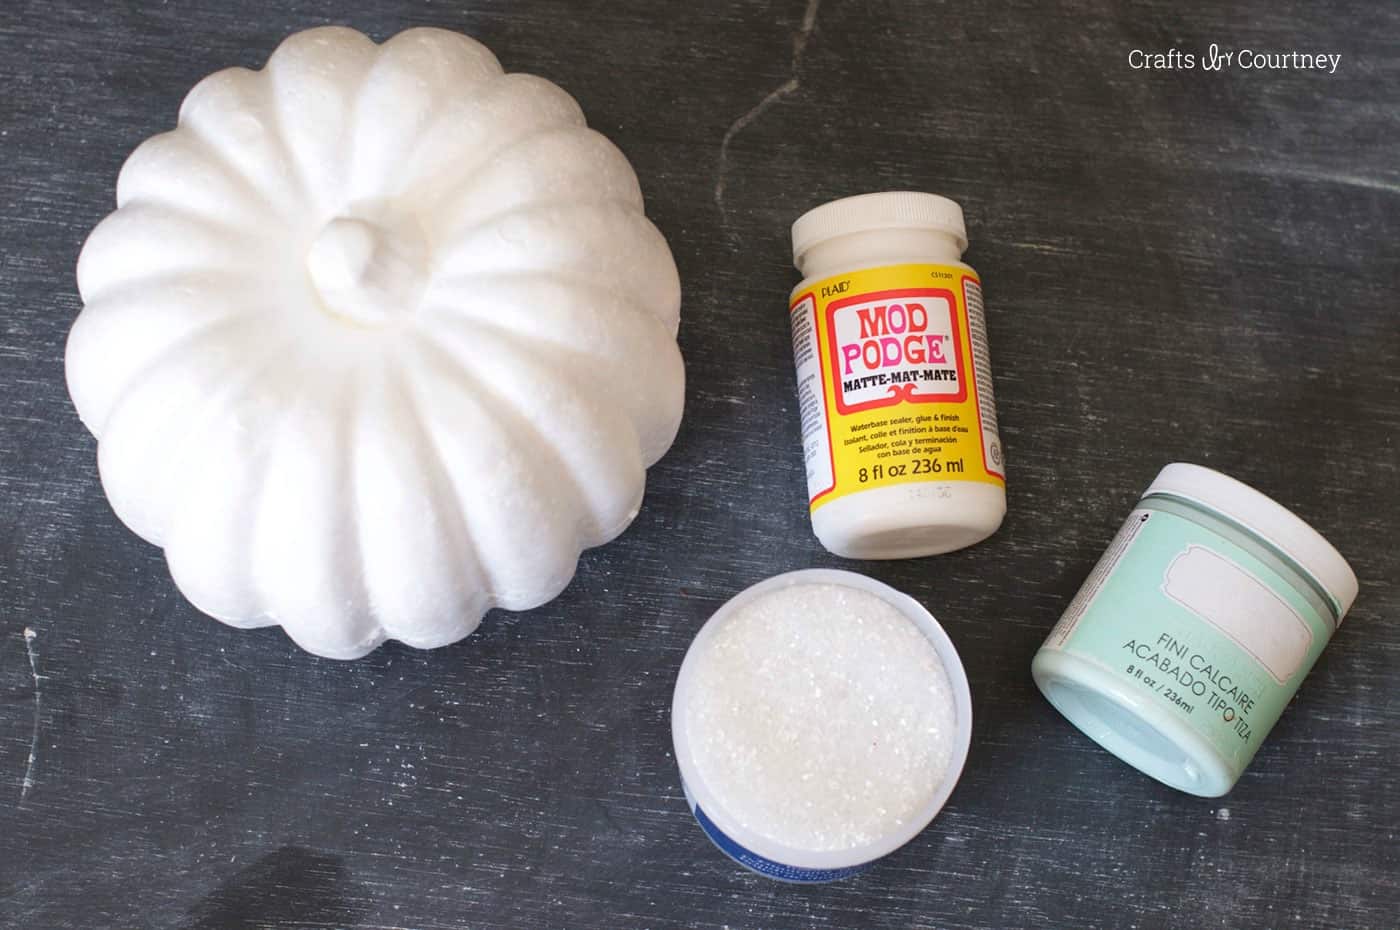
Gather These Supplies
- Mod Podge Matte
- Chalk finish – like FolkArt Home Decor Chalk
- Foam pumpkins
- Diamond Dust
- Paintbrushes
Getting Started
I had already purchased the foam pumpkins and I had the chalk finish, Diamond Dust, and Mod Podge on hand. I totally raided my stash for this project.
Time to get crafting!

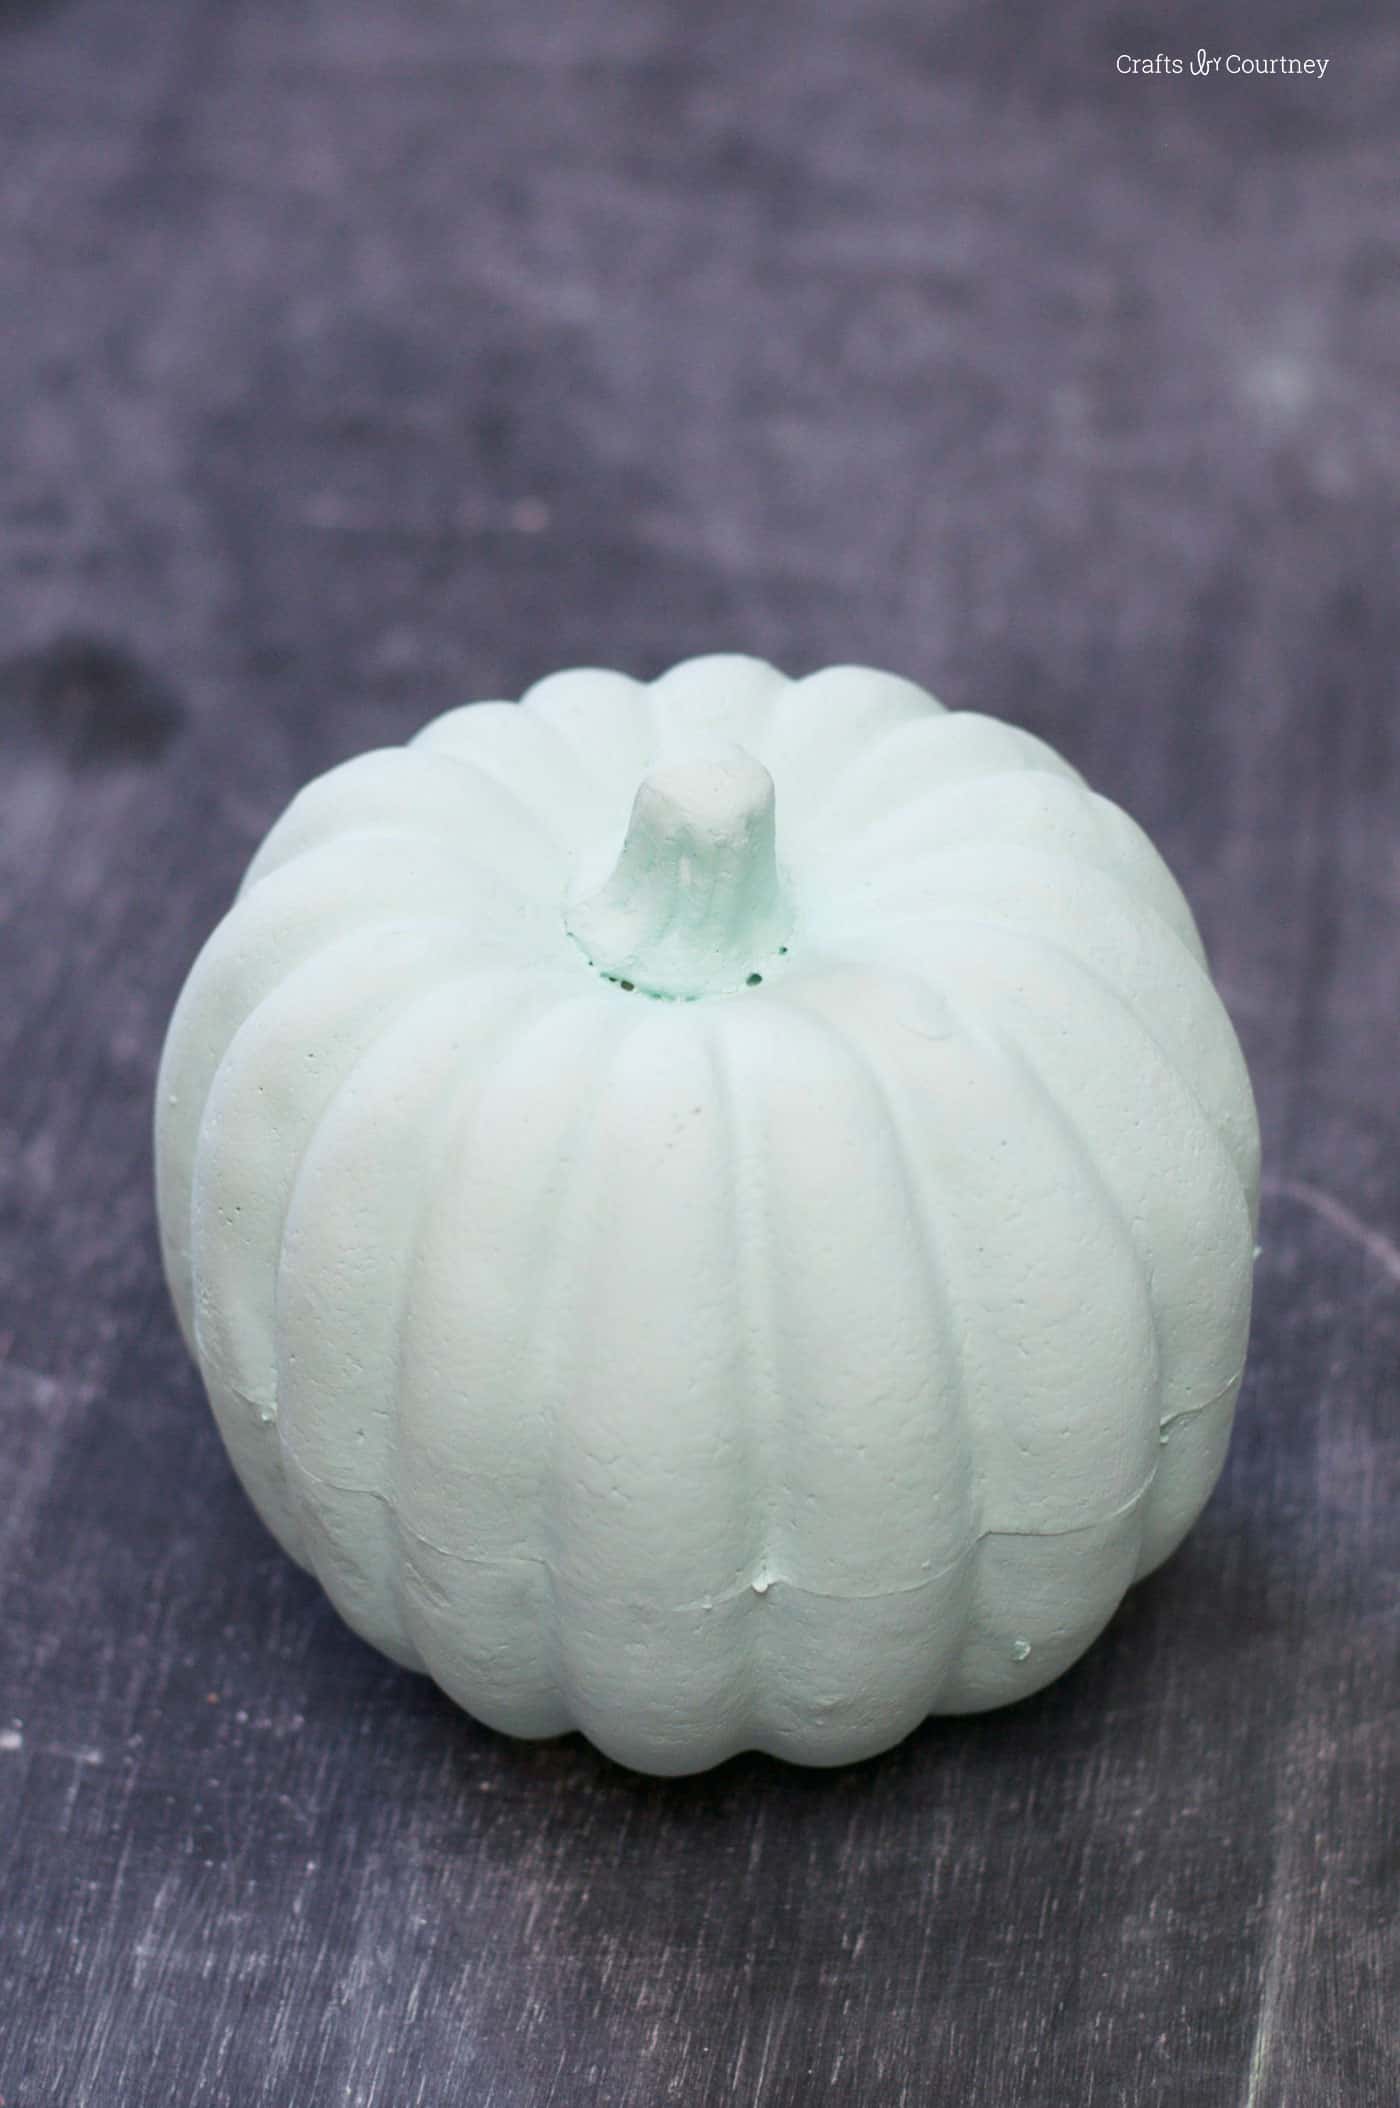
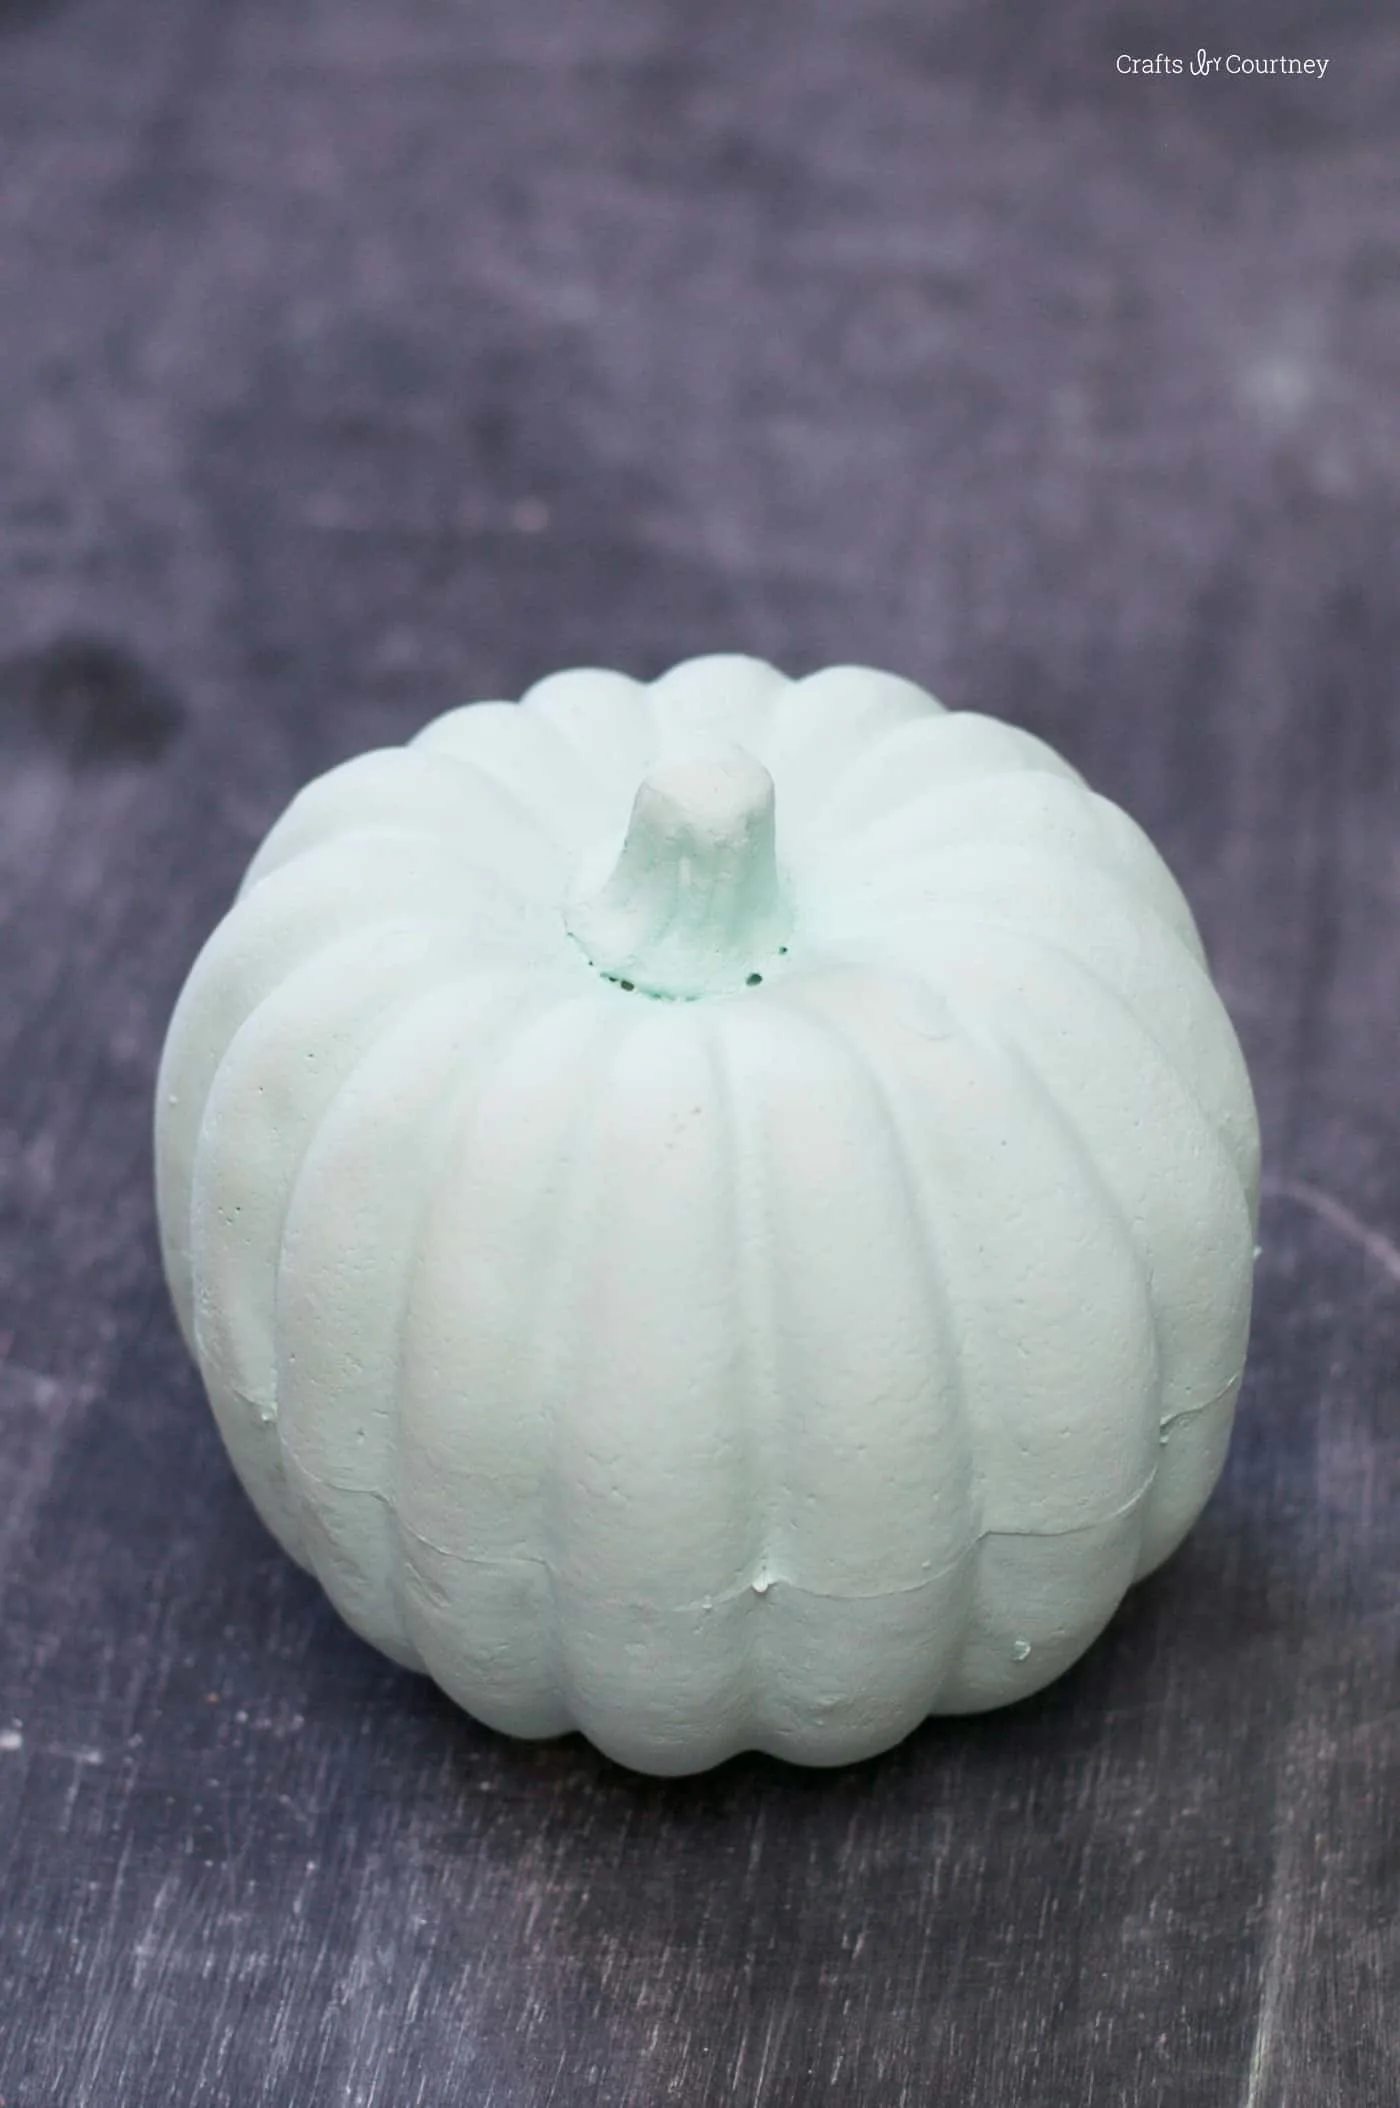
Step 1 – Paint the Pumpkin
I went with a light colored mint chalk paint. I painted on two coats, letting each one dry 20 minutes.
Step 2 – Add Mod Podge
All you’re going to do for this step is add Mod Podge in the areas that you plan to add Diamond Dust. I worked about 1/4 of the foam pumpkin at one time. You’ll paint down the sections of the pumpkin and then move onto step 3.
You’ll have to work somewhat quickly because Mod Podge dries quickly. You don’t want to paint the Mod Podge over the top.

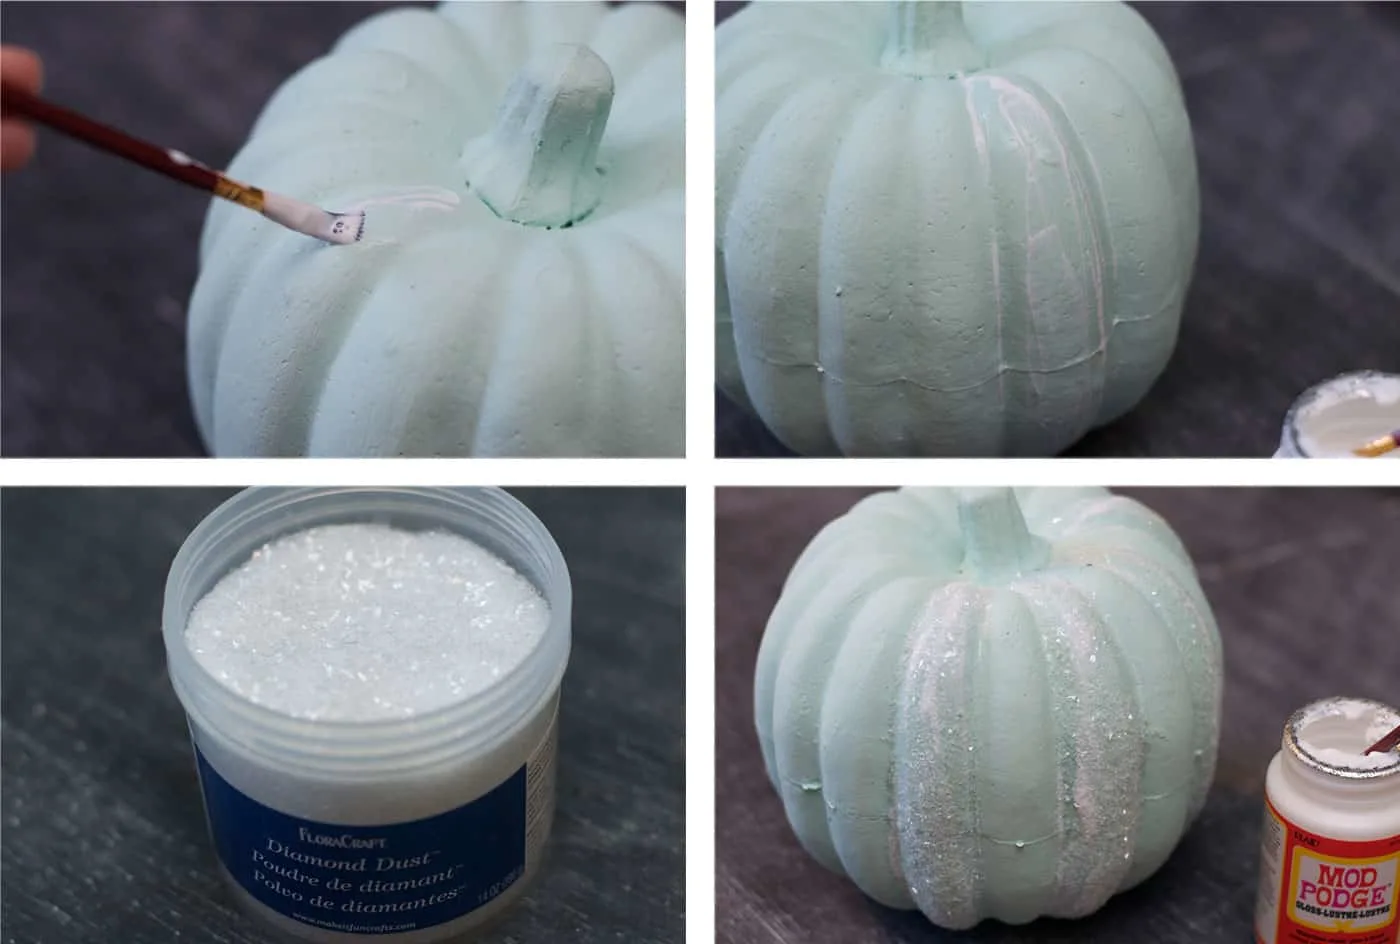
Step 3 – Add Diamond Dust
Now the fun part – adding Diamond Dust.
I love this stuff and want to add it to everything! I used my “handy dandy” Mod Podge to add it on my pumpkins, and did a total of three. My pumpkin decorations all dried pretty fast.
As I mentioned, I had Matte Mod Podge in my supplies photo but I ended up changing it to Gloss Mod Podge to make the Diamond Dust area a little more shiny.
Now that I’m finished, I’m ready to add these pumpkin decorations to my fall mantel. I think the little coral colored one turned out pretty cool, and will look great with the mint.

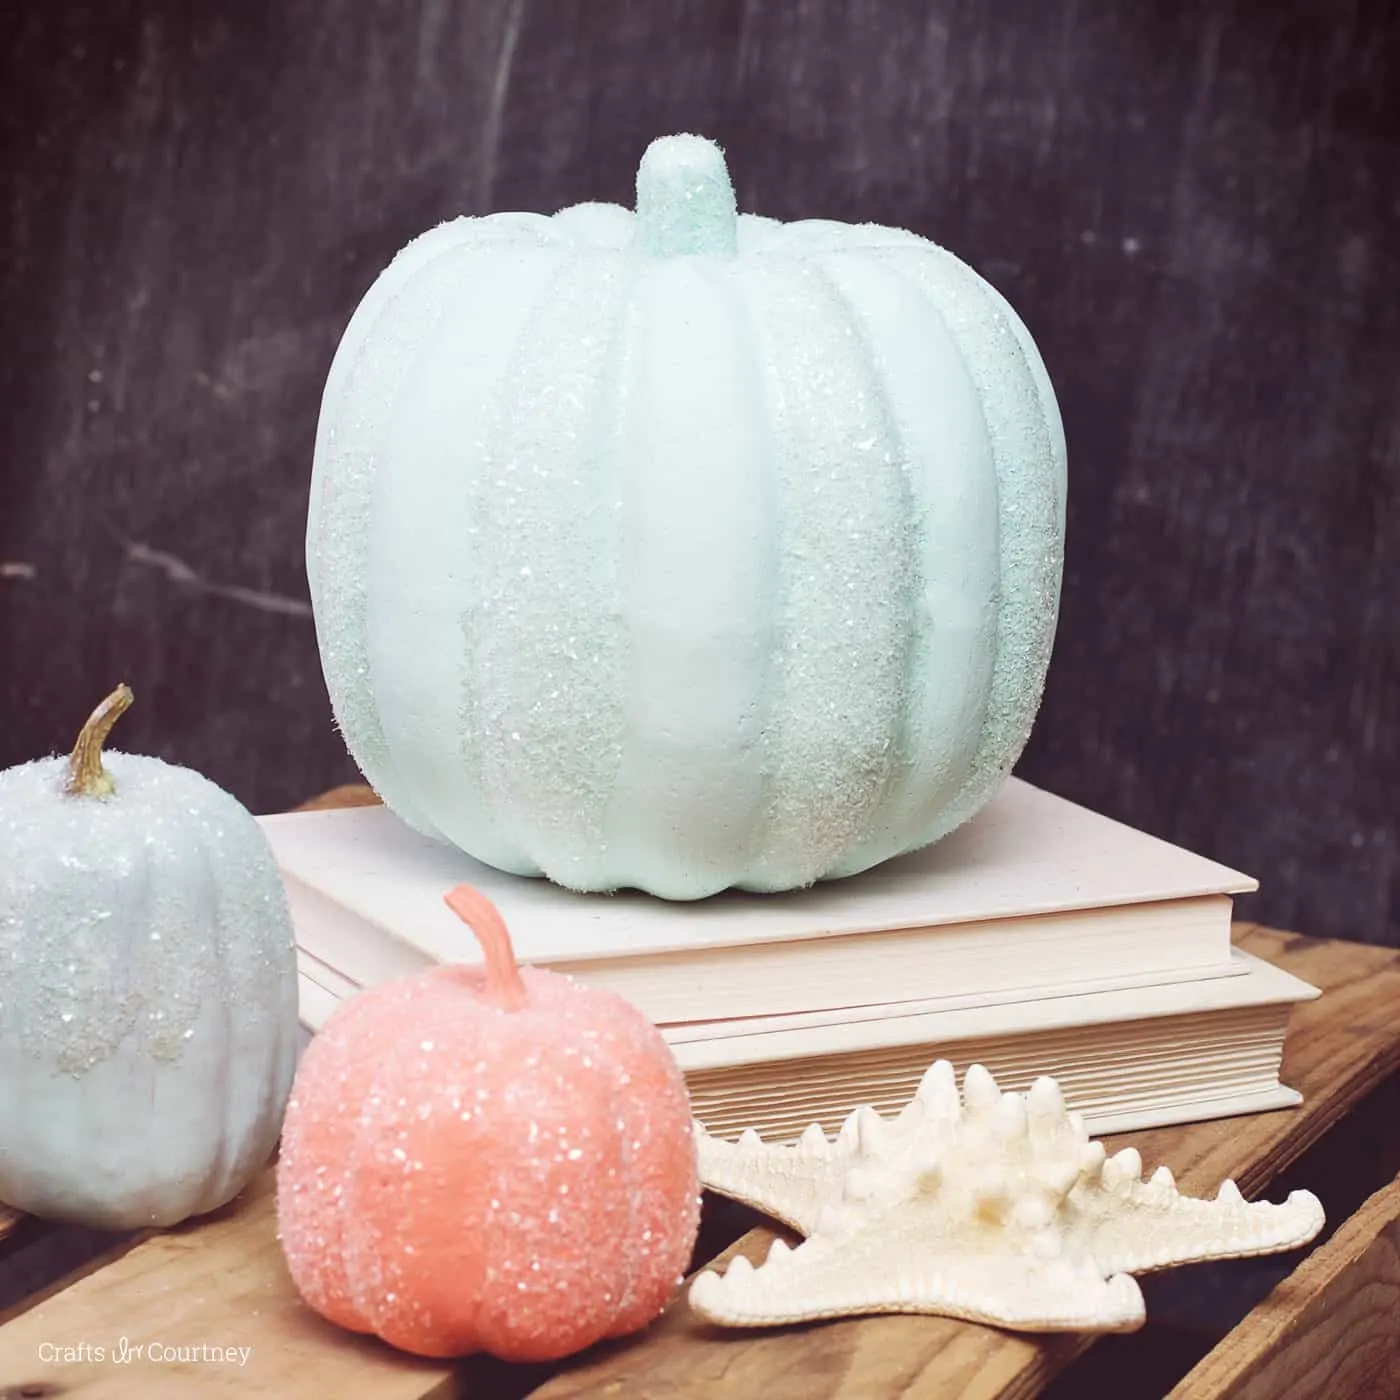
One of my favorite parts about this craft was how quickly I was able to do it. I have three boys aged 7 and under, so I don’t have a lot of time to spend on my crafts. I need something quick and this was that craft!
DIY Pumpkin Decor


Learn how to make these pumpkin decorations with chalk paint, Mod Podge, and diamond dust!
Materials
- Mod Podge Matte
- Chalk paint
- Foam pumpkins
- Diamond Dust
Tools
- Paintbrushes
Instructions
- Paint two coats of chalk paint on each pumpkin using the brush. Let dry between each.
- Apply Mod Podge to the pumpkin in any areas you would like to accent. Sprinkle Diamond Dust on the wet areas quickly and let dry.
- Repeat until all areas of the pumpkin that you would like to accent are covered. Let pumpkins dry completely before displaying.
Thanks for checking out my new autumn pumpkin decor for my home! This craft is part of our fall crafts for adults, Thanksgiving crafts for adults, and Dollar Tree fall crafts. I’d also love to you to check out these other projects I’ve made with Mod Podge for autumn:
- DIY Halloween Wreath
- How to Make a Fall Sign
- Decorating Pumpkins (75+ Ideas!)
- Mummy Halloween Luminaries
- Nautical Fall Pumpkin Decor
- DIY Wall Art with Scrapbook Paper
Stephanie Christy
Thursday 6th of September 2018
This looks like a lot of fun! I'll have to try this with my granddaughter. I too love the coral idea
Nancy Bell
Wednesday 4th of November 2015
Beautiful!!
Paige
Monday 26th of October 2015
These pumpkins are super cute! I think I could even pull them off!
Paige https://www.thehappyflammily.com/